
Are you wishing that you knew how to organize Google Drive so that you could actually find your files without having to dig around for hours? Organizing your files does not have to be hard — that’s why in this blog post, I will be talking you through how to organize Google Drive as a teacher, and my best tips and tricks for doing so!
Now, If you are a teacher and you are not currently using Google Drive for organization and hosting all of your teaching files, then we need to fix that! What’s great about Google Drive is that it’s cloud based, so it stores all of your files on the internet (which is especially great if you have thousands upon thousands of files), allowing you to access it from anywhere, as opposed to having to use a flash drive or external hard drive. I would recommend switching over sooner than later and using it as your digital file organization system for sure!
Now, let’s get to the goods: I wanted to share how to organize Google Drive for teachers, as it can be your organizational best friend and has been extremely helpful in reducing my overwhelm and increasing my productivity!
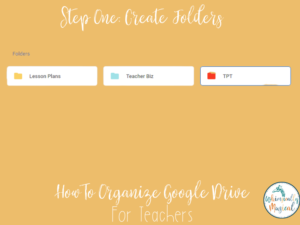
1. Create Folders
Folders are going to be how you categorize all of your documents from here on out, so we want to start with broad topics in order to move our documents easily to the folder that best matches its type!
You will simply click “Add New”, click “Folder” and insert the name of your folder (I like to use all caps, that’s just a personal preference)
Make as many folders as you need to cover your main categories (I’ll be referencing my teacher specific google drive- My three categories are Lesson Plans, Teacher Biz, & TPT (Teachers Pay Teachers). You will want to make sure to create names that make the most sense to you.
The folders will appear in alphabetical order, which if you’re anything like me, is not my favorite. (I like specific folders being at the top as I use them more often than others). How you can cheat the system is by adding a # to the front of the title (Ex: Instead of Lesson Plans, it would be 1. Lesson Plans). That will then cause it to be the first file in the order. You can do this for as many folders as you would like.
*** Pro-Tip: You can also change the color of the folders by right clicking on the folder and clicking “Change color.” I typically choose colors closely related to my brand colors because it just makes me happy but you could go the rainbow route if that pleases you, or just choose at random. You could also add emoji’s if you are feeling so inclined!
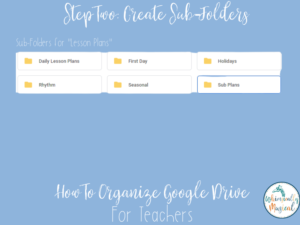
2. Create Sub-Folders
Of course you are going to have sub-categories (folders within folders), and that’s okay! The more organized, the better! The sub-folders should relate directly to the primary folder. Do not just randomly start creating sub-folders. Look at the files you already have and see what folders need to be created for them.
You will simply repeat the same process as earlier (“Add New”, click “Folder” and insert the name of your folder)
You can have as many sub-categories as necessary, and can easily change the order of the folders by using the # trick again (And color coding is always encouraged!- I always change the color of the sub-folders to match the overarching folder – Ex: Lesson Plans is yellow, so all of the sub-folders within that folder will also be yellow)
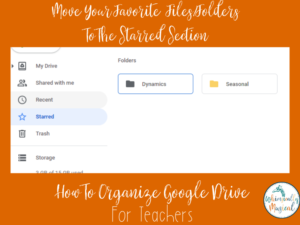
Pro-Tip:
If there are specific folders or files that you know you will be using on a regular basis, you can right click and click “Add to starred” and they will go to the starred section on Google Drive. Once you click on the Starred section, every folder or file you have starred will appear there for quick & ultimate access!
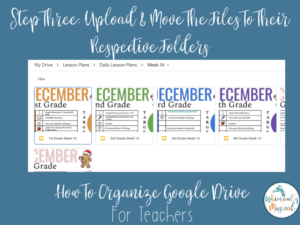
3. Upload & Move The Files To Their Designated Folders
You’ve done all of the labeling and structure- now what? It’s finally time to move & upload all of the files into their forever home!
If uploading them from your computer, the easiest way to do this is to go directly to the folder you would like it to live in, click “New” and click “File Upload”, you will then locate the document wherever it is on your computer, click enter, and it will begin uploading into your Google Drive.
*** Pro-Tip: You can also simply drag and drop files from your computer into your Google Drive if you want to speed up the process a little bit!
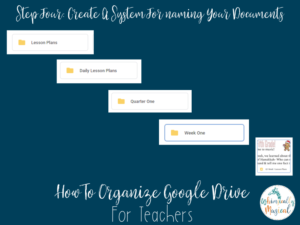
4. Create A System For Naming Your Documents
You need to use a consistent naming convention for folders, sub-folders, and files. You want to keep file names short & sweet in order to help you locate files much easier!
For example, I have a folder labeled “Lesson Plans” and within that folder, I have a sub-folder labeled “Daily Lesson Plans” and within that I have folders for each quarter, “Quarter One”, etc. and within that I have folders for each week, “Week One”, etc. ending with each lesson plan labeled by week “Week One Lesson Plans”. Each folder and file name is short, sweet, and explains exactly what it is within the title!
You want to make it easier on yourself and keep it simple. If you do not add a title, Google will pull from the first sentence of your document, which can be confusing!
Simplicity is key! If you are adding dates, put the entire date, in order to see what the latest edition of the document is. If you are abbreviating, try using capital letters, it makes it easier to identify.
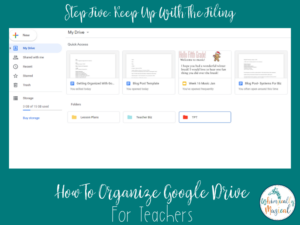
5. Keep Up With The Filing!
The key to organization is consistency- you have to be diligent at organizing your Google Drive often- there are two typical ways to keep up with the maintenance:
The first way involves moving files immediately into their respective folders upon creation of said file, and that may work for some, but that is not my brain type at all!
What I do is, at the end of every month, I set aside time during my CEO day for my business (More on that to come in a future blog post), and I spend about 15-30 min naming files and moving them to their respective folders. My motto is EVERY FILE SHOULD BE IN A FOLDER (If you’re unsure where to place a folder, simply create a TBD folder and stick it in there- then come back to it later and try finding it’s forever home at another time.)
*** Pro-Tip: Take time every month to delete unnecessary files as well. Just because you can keep files does not mean you need to. Do you ever plan on actually reading that free e-book you downloaded over a year ago? If not, delete it.
If you are unsure about deleting it, put it in a “To Delete” folder and check back in six months. If you still did not use it, delete it. The less clutter, the better!
And voila! Suddenly your Google Drive is clean, every file has a place, and it’s time to go celebrate! Like I said before, organizing your files in Google Drive does not have to be hard- it has saved me so much time- start cleaning yours out today! I hope this helpful and you are no longer wondering how to organize Google Drive for teachers- organization can happen for you!
Reminder: You don’t have to do this all in one day. If you have a lot of files, dedicate 15 minutes a day to organizing your Google Drive. Then, stop and move on (It can feel overwhelming at first, but eventually you will see progress, and before you know it, everything will be filed away!)
How would you rate your current Google Drive organization situation? 1 being “It is a hot mess express” to 10 being “I’m an organizational wizard!” Let me know in the comments below!
